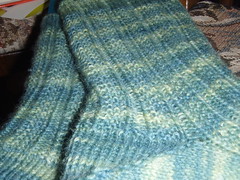
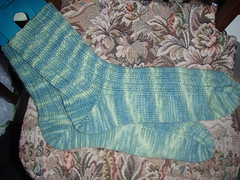
I’ve been having a stab at dye-your-own with some sock yarn. Overall it has been a success. I am pleased with the results. What do you think?
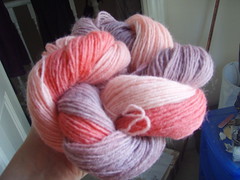
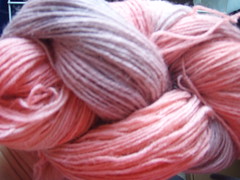
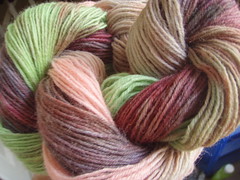
Pastel Nexus (Self Striping, hopefully) dyed with Kool-Aid Grape, Cherry and Pink Lemonade.
 Wrath of Kool-Aid
 (variegated) dyed with Kool-Aid Grape, Cherry and Pink Lemonade.
 It’s Black, Jim
 dyed with black, green and pink Supercook food colouring.
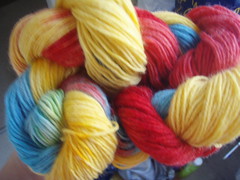
 Primary Directive
 (Self Striping, hopefully) dyed with red, blue and egg yellow Supercook food colouring.
For the top two I used some Kool-Aid received as part of a swap. The bottom two were using food colouring of the sort readily available in the UK. There are several articles on Knitty for dying using Kool-Aid:
Here,
here, and
here.
In any case, there’s nothing (that I’ve found) about dying with Supercook food colouring. So here’s my how to guide for that, along with some hints and tips that I’ve discovered.
You will need:
- Bottle(s) of Supercook food colouring in your desired colour. I used red, green, blue, egg yellow, pink and black.
- Paintbrush (optional, but recommended, I used one about 1.5 inches wide)
- Yarn wound into skeins (see below)
- Steamer (or other heat source, but I’m giving directions for use with an electric steamer)
- Vinegar (I’m told any sort will work, I used distilled white vinegar)
- A large Tupperware (or similar) type box with a lid (the lid is optional, but recommended)
- Jug(s) for water (Optional)
- Containers for dye (I used plastic pint glasses for mine)
- Tin foil
- Kitchen paper and/or unloved tea towel
- Plastic gloves (unless you want to dye your fingers!)
Preparation
- If you want to make longer repeats you’ll need a long skein, for variegated yarns a shorter skein will be fine.
- I soaked my yarn overnight in the Tupperware with about 2 pints of water and a quarter of a pint of vinegar for 200g of yarn. Use the lid if you don’t want your entire room to smell of vinegar (though it will when you start steaming anyway!)
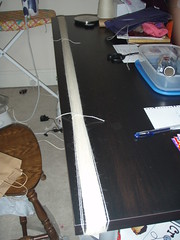
- Place the unloved tea towel on the table, with a piece of foil not quite as big as the tea towel on top of it.
- Put the Tupperware next to this set-up.
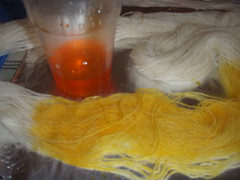
- Mix about a third of a pint of water (or less) with a good splash of the food colouring of your choice. You can mix these in advance, or you can wait until you’re ready to use it.
Let the dying commence
- For three colour yarn: place one third of the yarn onto the tin foil and the other two thirds into the Tupperware. (For two colour, just do half. If you want three even segments remember that the skein is a big circle, so if you do each end you’ll end up with the middle colour as two shorter stripes.)
- Using the paint brush, apply the first colour to the yarn on the foil. Use patting motions for good coverage.
- If the colour is not as dark as you would like, add more colouring to the water and re-apply. You can’t make it lighter, so err on the side of less to begin with.
- Once you’re happy that you’ve covered the yarn on the foil (check underneath too) then you need to do some jiggery-pokery to get the next bit ready. First you need to make sure that one of your gloved hands is clear of dye as you’re going to pick up the un-dyed yarn with that one. Kitchen paper works well to achieve that. Now, shuffle the yarn around so that the newly painted bit is at one end of the Tupperware, the next bit to dye is in your clean hand and the other un-dyed bit is at the other end of the Tupperware.
- Don’t put the undyed yarn on the foil until you’ve wiped it clean.
- Once the foil is clear of dye, place the next third (or however much) on the foil and away you go. Repeat from step 2.
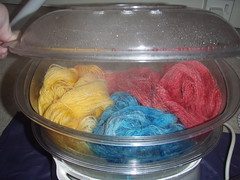
- Once you’ve painted all of the yarn, transfer it to a steamer bowl. Watch out, as it may drip. Place the steamer bowl on the steamer and set the timer for 30 minutes.
Once the yarn is cooked
- Don’t touch it yet! It’s hot, and you might felt it. but mostly because it’s scalding hot. Let it cool a bit
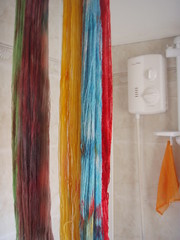
- Once the yarn is cool enough for you to handle you can take it to a water supply to rinse it. try to use water at the same temperature as the yarn. Rinse it until it doesn’t smell vinegary.
- Squeeze as much moisture out as you can, don’t wring. Hang the yarn to dry. If the weather is good enough for hanging outside this would be good, if not then over the bath works
Then all that is left for you to do is think of amusing, imaginative or downright silly names for your creations. While “pink, purple and more pink” is descriptive, Pastel Nexus is more interesting! I probably will never be able to recreate it, so I don’t mind giving it a daft name.
Hints and tips
- Don’t overfill the steamer or the colours will mix where the water touches them (see “It’s Black, Jim”)
- Black doesn’t come out black, but it is pretty (see “It’s Black, Jim”)
- The yarn will take overnight to dry. If you have a way of spinning it to get the water out this might help.
- if you want to be able to reproduce the colours, you will probably want to invest in things like: bottles for storage of dye, pipettes or measuring spoons, a notebook, some spare un-dyed yarn (or fibre) to store in the notebook.
- Dying is at least as addictive as spinning and sock knitting. Beware!