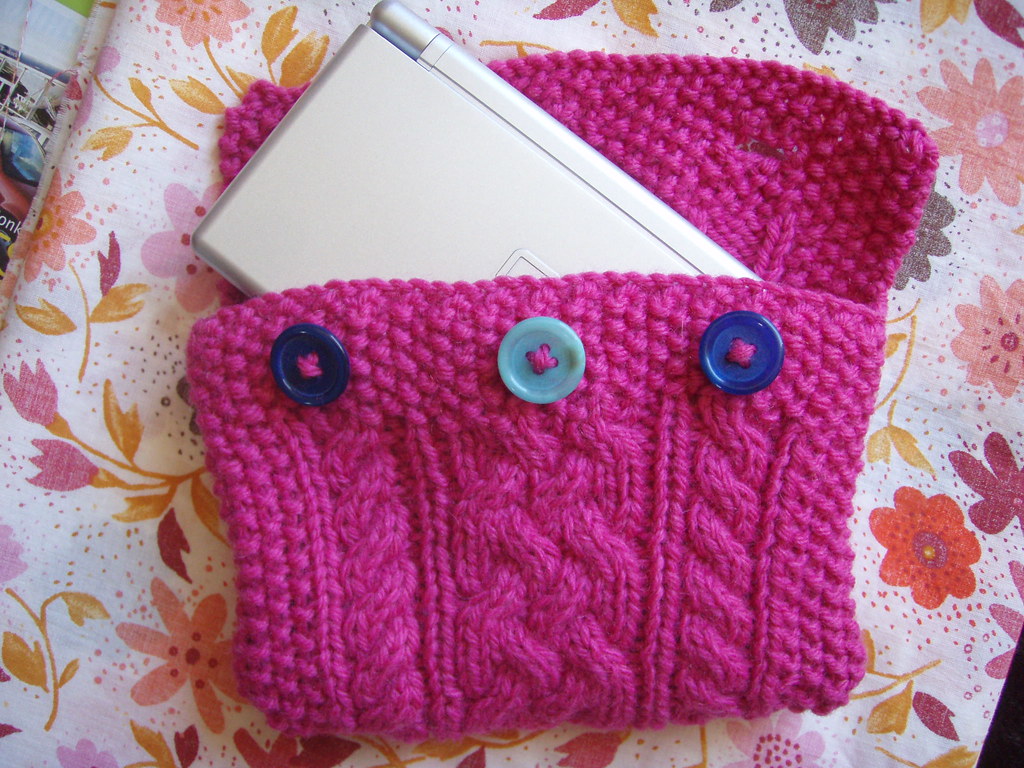
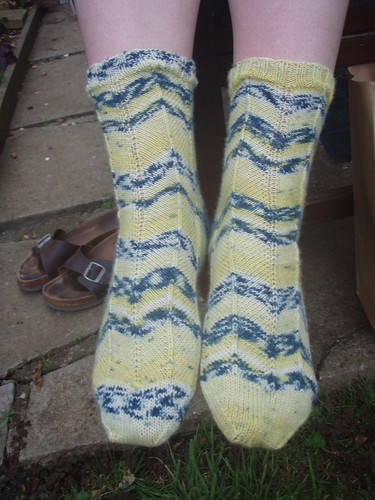
Monday 15 December 2008

Allo Allo Beret


Pattern: Russula Cap by Sally Pointer (Rav Link)


Yarn: Toft Alpaca Double Knitting Yarn (I used a whole ball for this hat - so either the yardage is out on the website, or the weight. I think it might be 115yds for 100g)


Needles: Some lovely steel dpns, Pony I think.


Modifications: instead of 10 row rolled hem, 5 rows k2p2 rib.
As I was running out of yarn, I decreased a bit more rapidly towards the last six or so rows.


More pictures on my Flickr Page.

Saturday 22 November 2008

Clapotis

Pattern: Clapotis by Kate Gilbert, from Knitty.com

Yarn:Natural Dye Studio's Dazzle, Blue Faced Leicester 4ply Sock Yarn in a colour a bit like Flame.

Needles: Some random metal needles I got a while ago at a charity shop, UK Size 6 (That would be 4mm, or US size 8)

Modifications: Other than using sock yarn, I also did 26 repeats of the pattern rather than 12. This was aided by the fact that I knew what weight of yarn I needed to have left. According to my scales I could have managed another repeat, but the scarf is plenty long enough as it is. I did the same number of increase rounds as the pattern suggests, I thought that was a reasonable width.

Clapotis on me

Review: I LOVE this pattern! It's so much fun to knit and simple enough to do while watching telly. It works up nicely and I'm sure once I've blocked it some more it will stay square. The yarn is also Lush, even despite some randomly darker bits, it looks great. This colour rocks! It pooled a bit (as you can see below) but really that just adds to the pattern, especially when worn.

Clapotis one end

Also, the BFL has a slight kink to it, which is really pretty and adds to the warmth, I think. It's by far the warmest scarf I have ever owned! I love it. If you haven't knit Clapotis then you should give it a try! I think that in sock yarn, you could make a skinnier version than I did and it would still look great!
Bascially I have nothing bad to say about the pattern or the yarn. 10/10 for both!

Clapotis from back

Friday 21 November 2008

Hamster House

We bought a posh house each for out hamsters. Aran seems to like his, but Rowan doesn't like his - he will not sleep in it.
So, I looked for a knit pattern for a hamster nest, and couldn't find anything suitable.

So I designed this one.

Hamster Home

Yarn: Rowan Pure Wool Aran (Sage), leftovers
Needles: 4.5mm dpns, set of 5.

Gauge is not that important as long as your hamster can fit into the nest. My hamsters are dwarf hamsters, so if you have a Syrian hamster you might want to make it bigger.

Pattern:
Main Section
Cast on 44 Stitches and join in the round on 4 needles, 11 on each needle
Work 4 rounds of moss stitch
Switch to stocking stitch and work until tube is 2 inches long

Decrease section
Round 1
knit to within 4 sts of end of needle, k2tog, k4, ssk, knit to end of needle, knit to within 4 sts of end of needle, k2tog, k4, ssk, knit to end of round.
Round 2
Knit

Repeat rounds 1 and 2 until there are 12 stitches remaining

Graft end closed.


Enjoy!

Sunday 16 November 2008

François Hat

Made for: My Dear Other Half

In: Rowan Pure Wool Aran

Pattern: Jaques Cousteau by Typy

Modifications: Yes. I used Aran instead of the recommended DK, so I adjusted the number of stitches down to 100, and then scaled the other sections accordingly.

Rating: I liked knitting this, it was quick too. The only problem I have is with the propensity of the top to point due to decreasing every row. But when worn it looks fine.


Francois Hat 4
Francois Hat 3
Francois Hat 2

Sunday 2 November 2008

Noro Striped Socks

The Noro Socks are also finished...
Noro Socks Tiptoe


I'm really pleased with these, they're on my feet as I type.

I used a basic sock pattern, a 5 row repeat, with an afterthought heel. The afterthought heel is over more than half of the stitches, which I think makes it fit much better than it would have on only half.

I'm sure the same principle would work on a short row heel, as it's about the angle - I read an article in (I think) Interweave.

Secret Santa Fetching

Finished...
Fetching

Monday 20 October 2008

Ladybird Socks

Pattern: Adjusted version of the Yarn Harlot's basic sock recipe

Yarn: Opal Ladybird 6ply

Ladybird Socks 3
Ladybird Socks 2
Ladybird Socks 1

Thursday 25 September 2008

Storm

Storm socks, sock putt entry, for OH.

Storm
I like the pattern, I love the yarn.
Storm 2

Monday 8 September 2008

Urban Vest, Completed

Urban Front


Sorry about the pose, it's early - before work!

I love the "vest" though - I'd call it a tank-top.

Brill, would make this again, but perhaps a little longer...

Dye Time

I’ve been having a stab at dye-your-own with some sock yarn. Overall it has been a success. I am pleased with the results. What do you think?
Pastel Nexus (Self Striping, hopefully) dyed with Kool-Aid Grape, Cherry and Pink Lemonade.

Pastel Nexus 2
Wrath of Kool-Aid (variegated) dyed with Kool-Aid Grape, Cherry and Pink Lemonade.

Wrath of Kool Aid 2
It’s Black, Jim dyed with black, green and pink Supercook food colouring.

It's Black Jim 7

Primary Directive (Self Striping, hopefully) dyed with red, blue and egg yellow Supercook food colouring.
Primary Directive 5


For the top two I used some Kool-Aid received as part of a swap. The bottom two were using food colouring of the sort readily available in the UK. There are several articles on Knitty for dying using Kool-Aid:
Here, here, and here.

In any case, there’s nothing (that I’ve found) about dying with Supercook food colouring. So here’s my how to guide for that, along with some hints and tips that I’ve discovered.


    You will need:

  • Bottle(s) of Supercook food colouring in your desired colour. I used red, green, blue, egg yellow, pink and black.

  • Paintbrush (optional, but recommended, I used one about 1.5 inches wide)

  • Yarn wound into skeins (see below)

  • Steamer (or other heat source, but I’m giving directions for use with an electric steamer)

  • Vinegar (I’m told any sort will work, I used distilled white vinegar)

  • A large Tupperware (or similar) type box with a lid (the lid is optional, but recommended)

  • Jug(s) for water (Optional)

  • Containers for dye (I used plastic pint glasses for mine)

  • Tin foil

  • Kitchen paper and/or unloved tea towel

  • Plastic gloves (unless you want to dye your fingers!)


  • Preparation

  • If you want to make longer repeats you’ll need a long skein, for variegated yarns a shorter skein will be fine.

  • table skein

  • I soaked my yarn overnight in the Tupperware with about 2 pints of water and a quarter of a pint of vinegar for 200g of yarn. Use the lid if you don’t want your entire room to smell of vinegar (though it will when you start steaming anyway!)

  • Place the unloved tea towel on the table, with a piece of foil not quite as big as the tea towel on top of it.

  • Put the Tupperware next to this set-up.

  • Mix about a third of a pint of water (or less) with a good splash of the food colouring of your choice. You can mix these in advance, or you can wait until you’re ready to use it.


  • Let the dying commence

  • For three colour yarn: place one third of the yarn onto the tin foil and the other two thirds into the Tupperware. (For two colour, just do half. If you want three even segments remember that the skein is a big circle, so if you do each end you’ll end up with the middle colour as two shorter stripes.)

  • Using the paint brush, apply the first colour to the yarn on the foil. Use patting motions for good coverage.

  • If the colour is not as dark as you would like, add more colouring to the water and re-apply. You can’t make it lighter, so err on the side of less to begin with.


  • Yellow not yellow

  • Once you’re happy that you’ve covered the yarn on the foil (check underneath too) then you need to do some jiggery-pokery to get the next bit ready. First you need to make sure that one of your gloved hands is clear of dye as you’re going to pick up the un-dyed yarn with that one. Kitchen paper works well to achieve that. Now, shuffle the yarn around so that the newly painted bit is at one end of the Tupperware, the next bit to dye is in your clean hand and the other un-dyed bit is at the other end of the Tupperware.

  • Don’t put the undyed yarn on the foil until you’ve wiped it clean.

  • Once the foil is clear of dye, place the next third (or however much) on the foil and away you go. Repeat from step 2.

  • Once you’ve painted all of the yarn, transfer it to a steamer bowl. Watch out, as it may drip. Place the steamer bowl on the steamer and set the timer for 30 minutes.


  • Steamy Primary Colours


    Once the yarn is cooked

  • Don’t touch it yet! It’s hot, and you might felt it. but mostly because it’s scalding hot. Let it cool a bit

  • Once the yarn is cool enough for you to handle you can take it to a water supply to rinse it. try to use water at the same temperature as the yarn. Rinse it until it doesn’t smell vinegary.

  • Squeeze as much moisture out as you can, don’t wring. Hang the yarn to dry. If the weather is good enough for hanging outside this would be good, if not then over the bath works


  • It's black Jim and Primary Directive


Then all that is left for you to do is think of amusing, imaginative or downright silly names for your creations. While “pink, purple and more pink” is descriptive, Pastel Nexus is more interesting! I probably will never be able to recreate it, so I don’t mind giving it a daft name.


    Hints and tips

  • Don’t overfill the steamer or the colours will mix where the water touches them (see “It’s Black, Jim”)

  • Black doesn’t come out black, but it is pretty (see “It’s Black, Jim”)

  • The yarn will take overnight to dry. If you have a way of spinning it to get the water out this might help.

  • if you want to be able to reproduce the colours, you will probably want to invest in things like: bottles for storage of dye, pipettes or measuring spoons, a notebook, some spare un-dyed yarn (or fibre) to store in the notebook.

  • Dying is at least as addictive as spinning and sock knitting. Beware!

Thursday 21 August 2008

Sunday 27 July 2008

Jaywalkers

The Jaywalkers, now completed
Jaywalkers
Jaywalkers 2

Saturday 19 July 2008

Small Lace Bag [corrections added]

UPDATE: PDF download available now

My newest pattern! Shh! It's for SP12. I'm hoping that she doesn't spot it, otherwise I'm done!

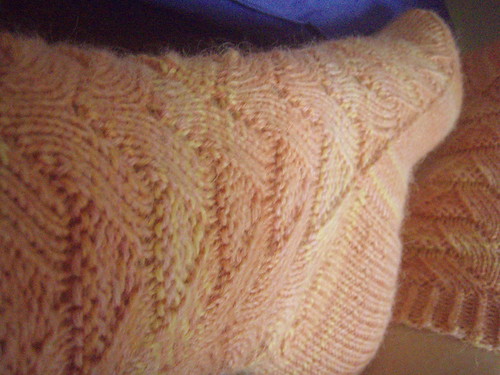
The stitch pattern for the lace is taken directly from the Big Book of Knitting Stitch Patterns
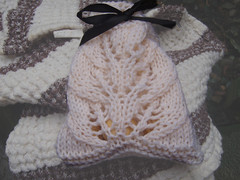
Front
Cast on 25 stitches and knit five rows of garter stitch (knitting in both directions)
Knit 3 repeats of the pattern.
Knit 5 rows of garter stitch.
Eyelet Row: k6, yo, k2tog, [k4, yo, k2tog] repeat to last 4 stitches, k5. (3 eyelet holes)
Knit 4 more rows of garter stitch.
Bind off.

Back
Cast on 25 stitches and knit five rows of garter stitch
Knit 24 rows of stocking stitch (knit on the right side, purl on the wrong side)
Knit 5 rows of garter stitch.
Eyelet Row: [k3, yo, k3tog] repeat to end (5 eyelet holes)
Knit 4 more rows of garter stitch


Stitch Pattern:
Sl-k-psso : slip one stitch as if to purl, knit one stitch, pass the slipped stitch over the one you just knit.
p2togtbl : purl two stitches together through the back loops

  1. p2, k7, k2tog, yo, k1, yo, p1, yo, k1, yo, sl-k-psso, k7, p2

  2. k2, p6, p2togtbl, p3, k1, p3, p2tog, p6, k2

  3. p2, k5, k2tog, k1, (yo, k1) twice, p1, k1, (yo, k1) twice, sl-k-psso, k5, p2

  4. k2, p4, p2togtbl, p5, k1, p5, p2tog, p4, k2

  5. p2, k3, k2tog, k2, yo, k1, yo, k2, p1, k2, yo, k1, yo, k2, sl-k-psso, k3, p2

  6. k2, p2, p2togtbl, p7, k1, p7, p2tog, p2, k2

  7. p2, k1, k2tog, k3, yo, k1, yo, k3, p1, k3, yo, k1, yo, k3, sl-k-psso, k1, p2

  8. k2, p2togtbl, p9, k1, p9, p2tog, k2
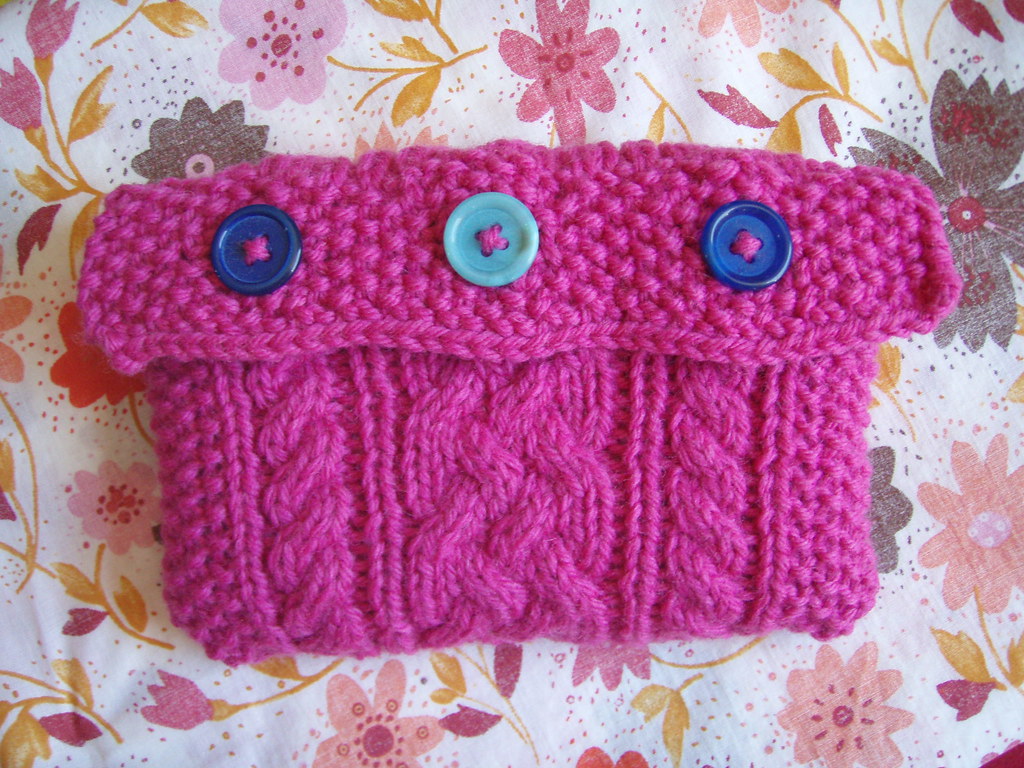
To make up:
Seam sides of bag.
Thread a length of ribbon through the eyelets in a manner which pleases you.
Pop some cedar balls in to protect your stash!
If you wanted to use lavender instead, I’d recommend lining the bag.

Sunday 13 July 2008

Manly Sweater, done.

Manly Sweater, started back in December 2007. Originally I was going to give it to OH for his birthday (February!)

It's finished now though, and it looks great. I'm really pleased with it!


Tuesday 1 July 2008

Ankh Socks

Yes folks, it's my first real live self-designed pattern!

Ankh Socks


[update]

The Download for the Ankh Socks is now available on Ravelry! (If you’re a knitter or crocheter and you’re not a member, go sign up! It’s well worth it)

So, if you’d like the pattern, click here (I hope!).


Please note, this pattern is designed to be a bit slouchy, due to the cotton content of the yarn I used. If you want it to be a bit tighter you might want to adjust it slightly.

I hope to knit another version a bit tighter in a plain yarn, so watch this space!


Errata:

lines 6 and 16 of the pattern state:

*k6, p1* repeat

but should state

*k5, p1* repeat


If I figure out how I made the pdf and how to upload a new one then I'll fix it in there too, but in the meantime it will have to remain as is.

Tuesday 20 May 2008

Earl Grey


Finally finished the Earl Grey socks as designed by the Yarn Harlot. They took a while, but I think that is because of two things:

  1. boys like longer socks than girls

  2. boys have bigger feet than girls


These things are true of OH and I, so socks for him take longer. They were a nice relaxing knit though, and look nice in the colour that he picked. The cable was a faff in places, but looks nice and made it interesting to knit (that much plain stocking stitch would have driven me to drink). I used some Cygnet Woolrich yarn. It’s meant to be washing machine safe and has enough polymide in it to be hardwearing even on OH.

I may make these again one day, but not just yet!

Bootees Mk2.

The other bootees were too small, so here’s another pair.

Wednesday 23 April 2008

Baby Bootees

For baby Ruby Shea


Ruby's Slippers by Hayzee C, on Flickr

Sunday 6 April 2008

Nintendo Cozy

I finshed the Nintendo Cozy from the Stitch n Bitch calendar.
Overall, I like it.
Nintendo Cozy

I didn't have three matching buttons, but hey random is funky, right?

Nintendo Cozy Again

the material it's on is the reverse of the designer material I bought for the frock I'm making for a wedding in a few weeks. I didn't mean to buy designer material...

Monday 24 March 2008

Slippers for OH

After the success of my Fluffy not Bunny Slippers, Oh asked me for a pair. So I ordered some lovely green cascade 220. He didn't want them fluffy, so he didn't get fluffy. It makes the gaps more obvious, but I still like em.

OH Slippers

Left Foot

Side

Saturday 15 March 2008

Noro Gloves

Design 27 by Jenny Watson from Noro Designer Mini Knits.

Finished Noro 1

Finished Noro 2

Finished Noro 3

Sunday 17 February 2008

Dreamcatcher

I also finished the Dreamcatcher square, but forgot to mention it sooner.

dreamcatcher

Fluffy Not-Bunny Slippers

I've finished the Not-Bunny Slippers. I say not Bunny because I decided against the ears and face that are really part of the pattern. I love them though! They are so cozy and comfy, and I can walk upstairs in them thanks to my own slight modifications!

Fluffy Not-Bunnies top

I love the effect the varigated Louisa Harding yarn made. That was the mohair yarn in there, The main pink is Cascade 220.

Fluffy Not-Bunnies sole

The sole is made from two strands of the Cascade held together. It's a little slippy on my laminate floor, but good on carpet. And nice and springy

Fluffy Not-Bunnies

As you can see the sides of the slipper come just under my ankle bone, this is good.

Fluffy Not-Bunnies sides

And they match my PJs and dressing gown!